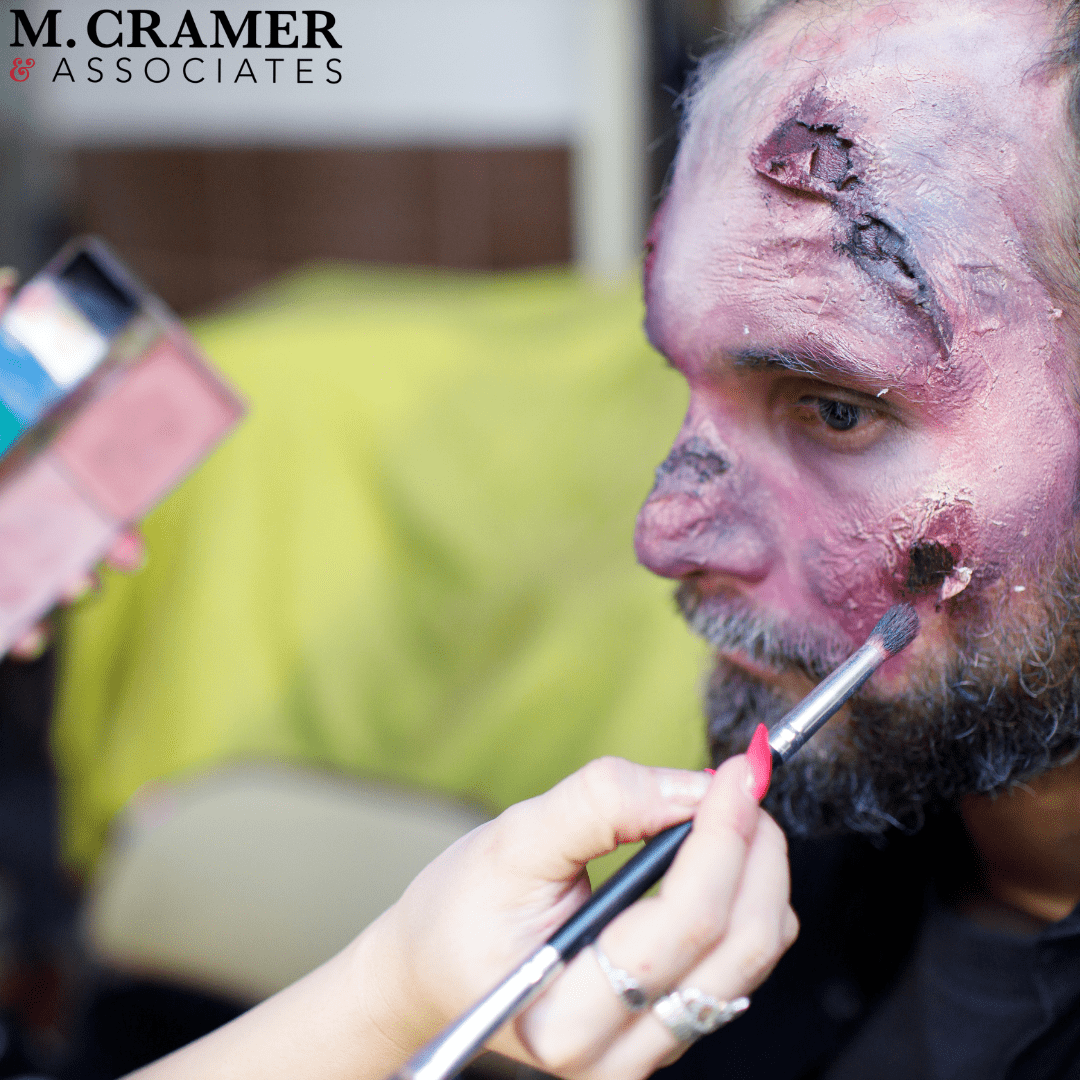
Ever wondered how Hollywood creates those gruesome yet realistic wounds?
Prosthetic makeup is a powerful tool for creating believable wounds, scars, and injuries for film, theater, or special effects work. A crucial aspect of prosthetic makeup is coloring the wounds to give them a realistic, lifelike appearance. Whether you’re aiming for fresh, oozing injuries or aged, healing scars, getting the colors right can elevate your makeup from good to stunning.
Types of Prosthetic Wounds
Fresh WoundsThese tend to have bright reds and pinks, sometimes with shades of purple or blue from bruising. The skin around the wound might appear red or irritated, and there could be signs of blood or fluid. |
Bruises & Old WoundsThese wounds will show varying shades of purple, blue, yellow, and green as they heal over time. Darker, deeper bruises might have darker reds or even brown tones. |
Scars & InjuryScars can range from pink and red (for newer scars) to pale or silvery for older scars. These should blend with the natural skin tones, but may still have some residual redness or pigmentation. |
Essential Tools and Materials
To color prosthetic wounds effectively, you’ll need a few essential tools and materials:

- Prosthetic Makeup: This can be purchased in various forms, including liquid latex, silicone, and pre-made prosthetics.
- Makeup Palette: A palette with a variety of colors, including reds, blues, purples, yellows, and browns.
- Brushes: A variety of brushes, including detail brushes, blending brushes, and stipple sponges.
- Blood and Ooze: Fake blood and ooze can add realism to your wounds.
- Setting Powder: To set the makeup and prevent smudging.
Step-by-Step Guide to Coloring Prosthetic Wounds
Step 1: Prepare and Attach the Prosthetic
Ensure the skin is clean and dry to optimize adhesion. Attach the prosthetic to the intended area using spirit gum or a prosthetic adhesive. Press firmly to ensure proper adhesion and allow it to set before proceeding. Use a latex for makeup or silicone prosthetic that’s designed to match the skin color. If necessary, paint over the prosthetic with skin tone paints to ensure it blends seamlessly. Use a makeup sponge or brush to blend the edges seamlessly with the surrounding skin.
Quick Shop M. Cramer Products: Ben Nye Spirit Gum, Latex for Sensitive Skin 2 fl oz, Latex – Dark Flesh, Liquid Latex (Light Flesh Tone)
Step 2: Apply Base Color
Select a foundation or flesh-tone makeup that closely matches the model’s skin tone. Apply this foundation evenly to the prosthetic using a sponge or brush, blending it seamlessly with the surrounding skin. To set the foundation and prevent smudging, apply a translucent setting powder.
Quick Shop M. Cramer Brushes: Paradise Makeup AQ 9 Brush Set, Ben Nye Ebony Translucent Powder Face Powder, Ben Nye Classic Fair Translucent Face
Step 3: Create Depth and Dimension
To add depth and dimension to the wound, use a lighter shade of foundation to highlight areas like cheekbones and the bridge of the nose. Use a stipple sponge or a fine-tipped brush to add faint lines of red or pink. Conversely, use a darker shade to create shadows under the eyes, around the temples, and along the jawline.
Contour the edges of the wound using a darker shade of makeup to create a more defined and realistic appearance. To simulate veins, use a fine-tipped brush and a dark red or purple color to paint thin lines.
Quick Shop M. Cramer Sponge Products: Mehron Stipple Sponge, Stipple Sponge – Carded, Nylon Stipple Sponge, Ben Nye LiquiSet Mixing Liquid, Barrier Spray, Ben Nye Ebony Translucent Powder Face Powder, Ben Nye Sienna Translucent Powder
Step 4: Color the Wound
For fresh wounds, use vibrant colors like bright reds, pinks, and purples to mimic fresh blood and inflammation. For older wounds, opt for darker shades of red, brown, and black to create a more aged appearance.
To simulate a bruise, use a combination of blues, purples, yellows, and greens.
Step 5: Add Texture and Detail
Use a stipple sponge or brush to create a textured effect on the wound, simulating skin damage or bruising. To further enhance the realism, use a small brush and a dark red or purple color to paint fine lines, simulating veins.
Create scabs by applying a darker shade of makeup or using small pieces of tissue paper.
Step 6: Apply Blood and Ooze
To add realism to the wound, apply liquid or gel blood. For a more realistic effect, add a clear or colored gel to simulate pus or other bodily fluids. To make the blood or ooze appear wet and shiny, add a touch of gloss.
Quick Shop M. Cramer Products: Coagulated Blood Gel, Mehron Coagulated Blood Gel, Squirt Blood
Step 7: Blend and Set
Use a makeup sponge or brush to blend the edges of the wound with the surrounding skin. Apply a translucent setting powder to lock the makeup in place and prevent smudging.
Finally, use a setting spray to further seal the makeup, ensuring it lasts throughout the performance or shoot.
Quick Shop M. Cramer Products: Buffers & Blenders Brushes, Ben Nye LiquiSet Mixing Liquid, Barrier Spray, Ben Nye Classic Fair Translucent Face, Ben Nye Sienna Translucent Powder
Shop Prosthetic Wound Makeup Products Now
Check out our other posts about stage makeup for more professional advice and thoughts on this life-changing art form.
| How to Apply Prosthetic Makeup: SFX Tutorial? | Old Age Makeup Tutorial for Theater |

